I've been in emergency response for seven years. In that time, I've coordinated more than 40 onsite incidents—falls, chemical exposures, struck-by-objects. One question always comes up first: was the victim's safety equipment in working order when it needed to be?
More often than not, the equipment could have been functional. It wasn't maintained. It wasn't inspected. It spent its life sitting on a shelf or hanging on a hook, treated like a tool that never needs attention—until it had to perform.
This checklist is for safety managers, site supervisors, and HSE professionals who want to break that pattern. Five steps. Fifteen minutes. Run it before the next shift starts, not after something goes wrong.
Step 1: Bullard Hard Hat Assembly Check
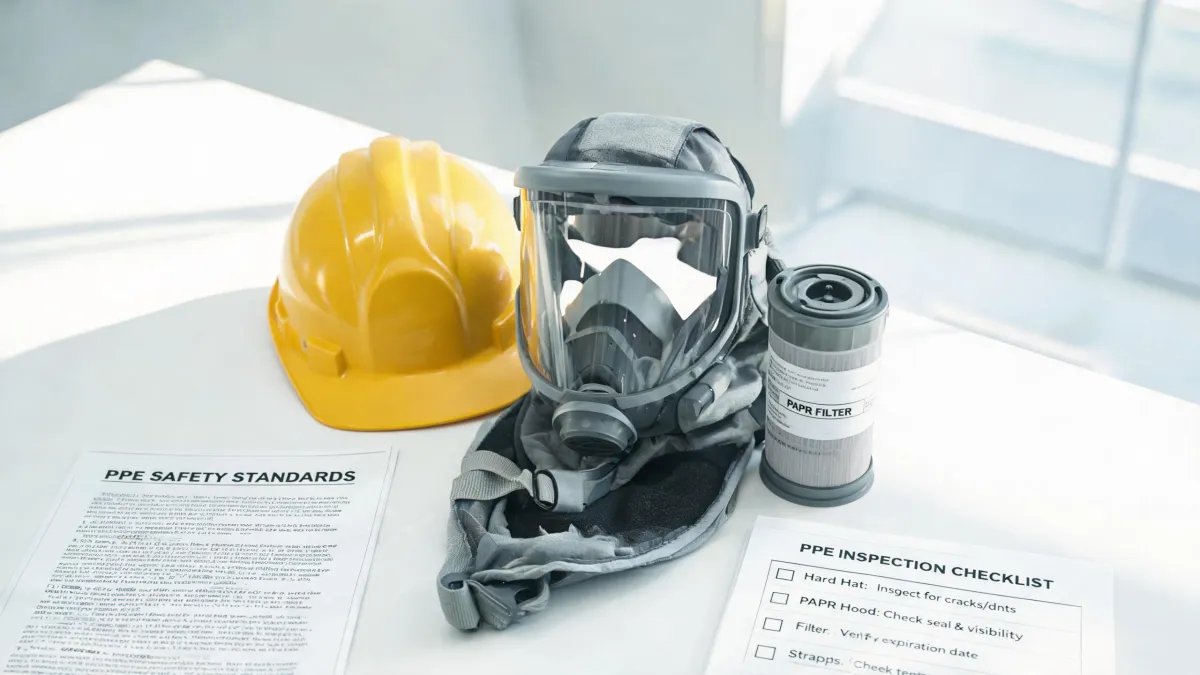
The hard hat isn't a hat. It's a complete impact protection system—notice the word system. Most people check the shell for cracks and stop there. The shell is half of the equation. The suspension system is the other half.
Here's what I check on every Bullard hard hat, in order:
- Shell integrity. Look for cracks, dents, or penetration marks. Run your fingers along the brim and crown. Any defect that catches your fingernail is a reason to replace it.
- Suspension system. Remove the suspension from the shell (on Bullard models, it snaps into the shell's internal slots). Check every attachment point. A worn or broken clip means the suspension isn't holding the shell at the correct distance from your head—the designed shock absorption stops working.
- Headband adjustment. Turn the ratchet adjustment. Does it tighten smoothly? If it sticks or slips, replace the suspension assembly.
- Manufacturing date. Look inside the shell for the date code. ANSI Z89.1 recommends replacing the entire hard hat after five years of use (Source: ANSI/ISEA Z89.1-2014).
Bullard has a legitimate claim to this category: E.D. Bullard invented the hard hat in 1919 (Source: Bullard, bullard.com). But brand history doesn't protect anyone if the assembly is wrong—and I see assembly errors more often than I'd like.
Most common issue: the suspension is installed upside-down or not fully snapped in. I've seen workers wearing hard hats where the suspension was barely hanging on. Not ideal. Five minutes of checking could have caught it.
Step 2: Bullard Respirator Inspection
Respiratory protection is the most safety-critical piece of PPE on this list. You can survive with a cracked lens or a dented shell—you can't survive a failed respirator seal. That's not dramatic; that's physiology.
Bullard makes both half-mask respirators and powered air-purifying respirators (PAPR). The PAPR systems carry NIOSH approval (Source: NIOSH, cdc.gov/niosh). Here's what I verify:
- Seal test. Put the mask on, cover the intake, inhale. The mask should collapse slightly against your face and hold. If air leaks, the facepiece doesn't fit. This is the single most important test.
- Filter condition. Check the expiration date on the cartridge. I caught an expired filter on a worksite in March 2024—two weeks past date, still in use. Replaced it immediately.
- PAPR battery (if applicable). Charge it, then verify the airflow. A PAPR with a dead battery is just a heavy facepiece.
- Hoses and connections. Look for cracks, kinks, or loose fittings. Air leaks here silently reduce protection.
Why does this matter? Because the difference between a functioning respirator and a failed one isn't visible in a photo. It's in the seal, the airflow, the small components (note to self: don't forget to check the exhalation valve on half-mask units).
After we switched to Bullard PAPR units last year, I kept second-guessing the investment. What if the maintenance requirements were more than we'd budgeted? Turns out the units are easier to maintain than the cartridge half-masks, and the quantitative fit test results were better across the board.
Step 3: Pit Viper Safety Glasses — Know the Limits
Pit Viper glasses are everywhere on job sites now. They look good, they're sold as safety eyewear, and they do pass the ANSI Z87.1 impact test. Fine. But as a safety guy, I care less about the brand and more about the application fit.
Pit Vipers work for:
- Impact protection (flying debris, chips, sparks)
- General construction and mechanical work
- Outdoor work with their tinted options
They don't work for:
- Chemical splash protection—you need a sealed goggle, not stylish glasses
- Welding—that requires welding-specific shades (ANSI Z87.1 doesn't cover welding filters)
- Workers with narrow faces—the frame geometry doesn't seal well for everyone
This is where I'll be honest: Pit Viper is a fine choice for impact protection. It's not the answer to every eye hazard. If you're in an environment with splash risks, buy the sealed goggles and skip the fashion (unfortunately).
In Q3 2024, we ran an internal comparison of four eyewear brands for impact resistance. Pit Viper's lenses held up fine. The fit variability was notable—two of our field techs couldn't get a secure seal. That was enough for us to order a backup style for those team members.
Step 4: Fence Wire Hazards on Site
This one seems too obvious to include. That's exactly why it stays on my list.
Fence wire in construction sites and industrial yards is one of the most underestimated hazards. Why? Because nobody plans to get hurt by it. It's just there—marking boundaries, securing storage areas, dividing zones.
Three things I check:
- Tension. Loose fence wire is a trip hazard. A snapped wire can whip. Check that all wires are properly tensioned and secured to posts.
- Exposed ends. Cut or broken wire ends are a puncture hazard. I've seen hand lacerations that needed stitches from an exposed wire end that was "fine" for weeks.
- Visibility. Fence wire is hard to see, especially in low light. Bright flags or signage prevent accidental contact.
When I'm triaging a worksite during an emergency response, I always note the fence lines. If there's an evacuation or a fast exit, damaged fence wire is the last thing someone needs to navigate.
Step 5: Fire Extinguisher Check & Recharge
Fire extinguishers are the definition of "better to have and not need, than to need and not have." But having one isn't enough—it has to be pressurized and functional.
Here's my monthly extinguisher check:
- Pressure gauge. The needle should be in the green zone. If it's in the red, the extinguisher needs attention.
- Safety pin and seal. Intact? If the pin is missing, the extinguisher can discharge accidentally.
- Physical damage. Dents, rust, or corrosion on the cylinder.
- Inspection tag. When was the last professional inspection? Monthly visual checks are your job; annual maintenance is a professional's job.
Now, the question I get most: how to recharge a fire extinguisher?
Short answer: don't do it yourself. I'm not a certified fire equipment technician, so I can't walk you through recharging, and neither should you try it. Recharging involves pressurizing a cylinder to hundreds of PSI—get that wrong and it becomes a projectile. I've seen the aftermath of a DIY recharge attempt: valve failure, leaked agent, and an extinguisher that looked fine but performed like a paperweight. Not great. Not terrible. Just useless.
The right process:
- Verify the pressure test tag is current (most extinguishers need hydrostatic testing every 5-12 years, depending on type).
- Contact a licensed fire equipment service company.
- Have them evacuate, inspect, and recharge the unit.
- Request a service tag with the date and technician's certification.
Cost? Typically $30–50 for a standard 5-lb dry chemical recharge (based on quotes from local fire equipment suppliers, January 2025; verify current pricing). A replacement extinguisher runs $40–60. Either way, nowhere near the cost of a small fire that wasn't contained.
In 2023, our company almost lost a storage shed because a 10-year-old extinguisher couldn't discharge. We saved the building with two 20-lb units, but the old one? The valve had corroded from the inside out. It looked perfect on the outside. That's when we went to a strict 6-year replacement policy, regardless of appearance.
Final Notes: Common Mistakes I See
- Fixing the shell, ignoring the suspension. A hard hat with cracked suspension is worse than no hard hat—it gives a false sense of protection.
- Trusting the expiration date. Dates are advisory minimums. Exposure to UV, chemicals, or extreme temperatures can degrade PPE faster. Use the date as a starting point, not the final word.
- Skipping the seal test. A respirator that hasn't been fit-tested is a hazard, not protection. Run the quantitative fit test before the first use and annually after that.
- DIY extinguisher recharge. Just don't.
None of this is revolutionary. It's basic, consistent checking. The kind of thing that takes fifteen minutes and saves you from the kind of phone call that goes, "we have an injury." I've made that call three times in my career, and every single time, the root cause was equipment that should have been caught during a routine check.
Do the check. Do it now, before someone needs it. (I should take my own advice more often—I've been meaning to update our lockout/tagout checklist for weeks.)