-
Who This Is For
-
Step 1: Map the Actual Hazards Before You Buy Anything
-
Step 2: Inspect Head Protection — Shell, Suspension, and the Sweatband Nobody Checks
-
Step 3: Bump Cap or Hard Hat? Get This One Right
-
Step 4: Welding — Setting Up and Maintaining a Miller Welding Helmet
-
Step 5: Respiratory Protection — Certification Comes First
- Step 6: Site Perimeter — Ranch Style Fence Basics
-
Step 7: Documentation — What to Keep and What to Verify
-
Common Mistakes to Avoid
This checklist is for the person who has to sign off before a site opens — HSE managers, site supervisors, the guy or girl who both places the PO and walks the floor. Seven steps, covering everything from what's above a worker's head to what's around the site boundary. Twenty minutes end to end, tops. That's cheaper than the redo.
Honestly, when I first took over PPE spec review, I assumed the hard part would be negotiating price. That was wrong, and it took me about a year to see it. Price is easy — vendors compete for it. What actually bites you is gear that doesn't match the task, and mismatches don't announce themselves. They sit in a locker until the day they matter.
Who This Is For
If your job touches head protection, welding PPE, respiratory equipment, or site boundary control, and you'd rather not read a 30-page spec sheet to make a call, this is written for you. It's weighted toward operations running steady crews on industrial, construction, or mixed agricultural sites. If you're a seasonal contractor hiring 200 people a week at peak, the logic still holds but the cadence is different — I'll flag where that matters.
Step 1: Map the Actual Hazards Before You Buy Anything
Don't open a catalog yet. Walk the site for twenty minutes and write down hazards only. No solutions. Just the problems.
What I look for on every walkthrough:
- Falling objects — anything staged above shoulder height counts, including tools left on lifts
- Flying particles from grinding, cutting, or chipping
- Molten metal or sparks from welding and torch work
- Dust, fume, mist, or vapor
- Low beams, conveyors, and machine housings at head level
- Chemical splash or spray
Here's the thing people skip: falling objects and bump hazards require different equipment. A hard hat is designed for one. A bump cap is designed for the other. Writing your hazard list first is what stops you from buying the wrong one for the whole crew.
Step 2: Inspect Head Protection — Shell, Suspension, and the Sweatband Nobody Checks
Most head protection failures I've seen weren't caused by a bad shell. They were caused by a worn suspension or a rotted sweatband that let the shell sit wrong on the head.
Run this check weekly, and again any time a helmet takes a hit:
- Shell. Hold it under bright light. Look for deep gouges, hairline cracks, chalky or dull patches (that's UV degradation), and any sign of penetration. If you can flex the crown easily, it's done.
- Suspension. Check every clip, every stitch, every ratchet tooth. A stretched or cracked suspension is a rejection, not a maybe.
- Sweatband. This is the one that gets ignored. A Bullard hard hat sweatband that's gone stiff or salt-stained will change how the helmet sits and how often workers take it off — which is its own hazard. Replace on a schedule, not on a feeling.
For reference, most manufacturers put shell service life around five years and suspension around two, but you go by the manufacturer's own guidance plus your inspection findings, not by a rule of thumb from the internet. And yes — this was accurate as of Q4 2024, so verify against current manufacturer documentation.
Step 3: Bump Cap or Hard Hat? Get This One Right
This is where I see the most expensive mistakes, because the wrong answer is cheap and the right answer looks like overkill until it isn't.
Plain version:
- Bump cap — protects against your own movement into a fixed object. Low beams, machine housings, conveyor frames. Nothing falling from above.
- Hard hat — protects against impact from above. Falling tools, dropped hardware, struck-by events.
A Bullard First Base bump cap is a good fit for maintenance techs, warehouse staff, and mechanics working under equipment where there's no overhead hazard. It's low-profile, so people actually keep it on. That matters more than most spec sheets admit.
But here's the limitation, and I'd rather say it plainly: if there's any realistic chance of something falling from above your workers, a bump cap is the wrong tool. Full stop. I've watched teams try to save money by standardizing on bump caps site-wide, and it works right up until the first dropped wrench.
Step 4: Welding — Setting Up and Maintaining a Miller Welding Helmet
Welding helmets aren't a set-and-forget item. Two things go wrong most often: lens condition and headgear fit.
- Check the front cover lens. Pitting and spatter build-up cut visibility and cause welders to lift the hood — which is exactly the behavior the hood exists to prevent. Swap cover lenses on a schedule, not when someone complains.
- Test the auto-darkening function before each shift. Trigger it with a lighter or the actual arc and confirm the shade change is instant. A slow lens is a red flag, not a quirk.
- Check the headgear. A Miller welding helmet that slides or tilts mid-weld forces the welder to hold it with one hand. That's a two-hand job becoming a one-hand job, and it's how burns happen.
- Match shade to process. The right shade depends on the amperage and process you're running. Use the manufacturer's shade chart — don't guess.
Step 5: Respiratory Protection — Certification Comes First
For any respirator, the first question isn't comfort or cost. It's whether the unit is actually certified for what you're using it for.
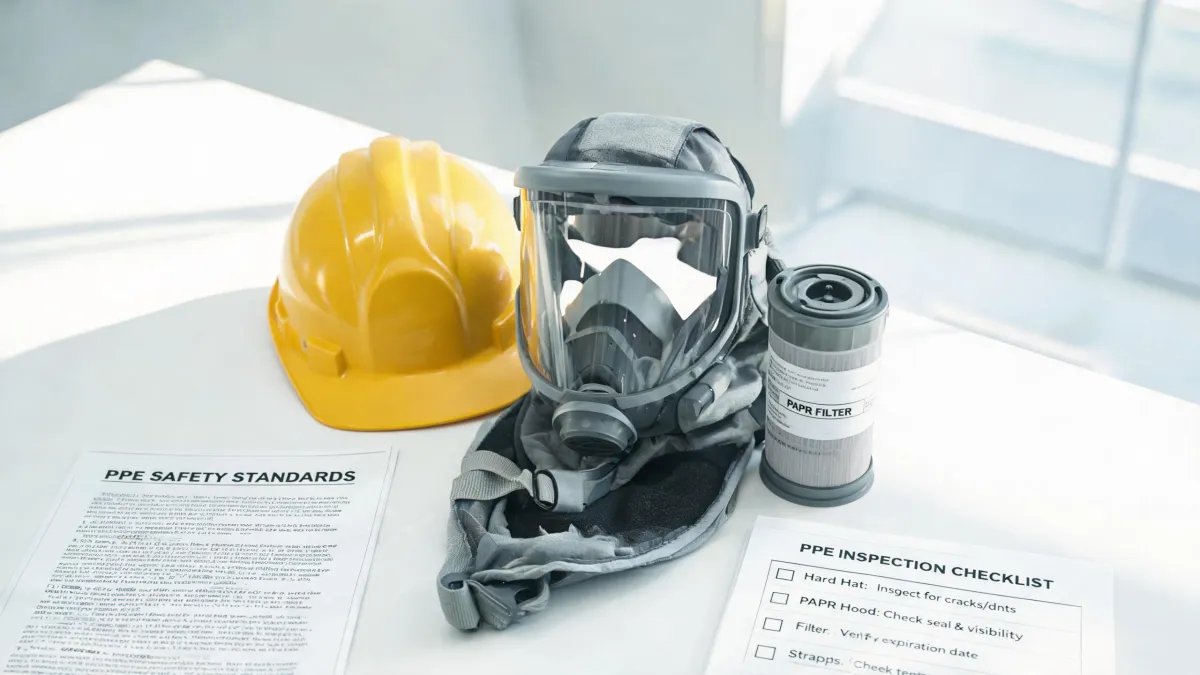
For powered air-purifying respirators (PAPR), check for a NIOSH approval number and verify it against NIOSH's certified equipment list. If a supplier can't produce a verifiable approval number, that's a deal-breaker. Per FTC advertising guidance (ftc.gov), claims about certifications have to be substantiated with evidence — so "NIOSH-approved" without a lookup-able number isn't a claim, it's marketing.
Beyond certification, the routine checks are:
- Battery charge and runtime for the blower
- Hose condition — cracks, kinks, or loose couplings kill airflow
- Facepiece seal — a PAPR doesn't remove the need for fit testing
- Filter and cartridge match to the contaminant. Wrong cartridge for the hazard is one of the most common causes of a rejected delivery in my experience.
Step 6: Site Perimeter — Ranch Style Fence Basics
Perimeter control doesn't get the attention that head protection does, until someone walks into an active work zone or a stray arc flash reaches a passerby.
A ranch style fence — posts with horizontal rails, no mesh — is common on agricultural and mixed-use sites because it's cheap, fast, and visible. It's also the version most crews end up building themselves, which is why the basics matter.
How to Make a Fence (Ranch Style) — Quick Version
- Call your local utility locating service before you dig. This is non-negotiable and it's the step people skip when they're behind schedule.
- Set the line. String line from corner to corner, and confirm the fence sits outside the fall zone of any overhead work.
- Mark post positions. Ranch fence post spacing typically runs 8 to 10 feet, but local code governs — check yours before you buy material.
- Dig and set posts. A common rule is burying about one-third of the post's above-ground height. Corner and gate posts need more, plus bracing.
- Attach rails. Two to three rails is standard for ranch style; more rails if livestock or vehicles are involved.
- Brace the corners. Corner bracing is what keeps the whole run standing after the first big wind.
One caveat: this works for us on a fixed site with a stable crew. If you're fencing a temporary laydown yard that moves every few months, temporary panel systems will likely serve you better than a built fence. Different calculus.
Step 7: Documentation — What to Keep and What to Verify
Inspections are only worth the paper they're written on if the paper exists. Keep:
- Inspection dates and pass/fail notes for every helmet, hood, and respirator
- Certification documentation with verifiable numbers
- Replacement schedules for consumables (sweatbands, cover lenses, filters)
- Fit test records for anyone using a tight-fitting respirator
Note to self: our own records have gaps, and I know it. It's on the list to fix. Don't let yours get there.
Common Mistakes to Avoid
Bottom line, these are the ones that cost real money:
- Bump caps used where hard hats are required. The most expensive shortcut on this list.
- Running a suspension past its service life. Cheap part, big consequence.
- Ignoring the sweatband. Small detail that changes how often workers keep their helmet on.
- Mismatched respirator cartridges. A frequent cause of rejected shipments and, worse, a false sense of protection.
- Fence built once, never inspected again. Posts settle, rails loosen, corners lean after a hard rain.
- Documentation checked once at onboarding and never again. Records have to keep pace with changes in equipment and personnel.
Nothing here is a no-brainer to keep running — it takes a schedule and someone willing to hold the line on it. But if you get these seven steps into a routine, most of what reaches your loading dock will be right the first time, and most of what happens on site will be boring. Boring is the goal.